A Guide to Growing Microgreens
- Jenna Zanchettin
- Mar 24, 2025
- 4 min read
Updated: May 17, 2025

Transform Your Salads with Vibrant Microgreens: Add Flavour and Nutrition to Every Bite!

Ditch the Boring Salads and Join the Microgreen Club – Once You Start, You'll Never Go Back!
Microgreens are essentially miniature vegetable seedlings that you can grow all year round. If that's not half of their appeal, they will be the quickest-growing greens you will ever grow! Harvesting within 7 to 20 days, depending on your environment.
These young, tender greens are harvested at an early stage of growth before they turn into a veggie seedling that you would normally plant out in the garden. These miniature plants are filled with flavour and packed with nutrients, and perfect for even the smallest spaces as you can grow on your kitchen bench top.

Garden centres make it easy for you to get started. You can buy pre-mixed seed blends that are full of various vegetable and herb varieties, including broccoli, cress, coriander, parsley, beetroot, mustard, radish, and more.


Containers
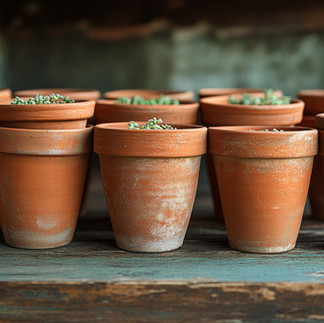
Troughs or terracotta pots work well for growing microgreens.
Growing Media
Use seed-raising mix or coir briquettes for optimal growth.
Seeds
Consider brands like Oderings Microgreen Mix Seeds and Mr Fothergill's Microgreens for your seed selection.
Storage
Microgreens can last in the fridge for up to two weeks in an airtight container with a moist paper towel on top.
When to Grow
Microgreens can be grown all year round.
Harvest Time
You can start eating your microgreens in just 7 to 20 days! In the cooler months, it can take up to 30 days.
Don't Forget
The paper towel is a game changer in the growing process.


How to Grow Microgreens
1. Choose Your Microgreen Seeds
The initial step is to choose the type of microgreens you wish to grow. It's crucial to pick seeds that are specifically designed for microgreen growing. These can be bought from gardening shops or online, and often come with detailed growing instructions. If you buy a seed mix that includes pea seeds, I prefer to plant those in a separate container since they mature at a different rate than the other seeds.
2. Select a Growing Container
Microgreens don't need large containers. Shallow punnet trays, pots, terracotta, or troughs with drainage holes are ideal. One of the best troughs I've ever used is an Elho Green Basics Trough, which features an integrated saucer - it's very sturdy, slim, and made from recycled plastic.
3. Prepare the Growing Media
Microgreens thrive in a well-draining medium. A seed-raising mix is perfect because a typical potting mix may be too strong for seeds and might have too much fertiliser. The seed-raising mix you choose should not contain perlite or pumice, as they are too coarse. Fill the container with the mix, leaving a 1-2cm gap at the top. Using your hands, press the seed-raising mix lightly into the container and moisten it so the soil is damp but not soaked, ensuring water doesn’t rapidly drain out of the holes. I prefer using a Bottletop Waterer because it's gentle and can easily attach to the top of an old soda bottle.
4. Sow the Seeds
Spread the seeds evenly across the soil's surface. To achieve a lush, dense growth, sow the seeds thickly but not excessively. Don't skimp at this point; if you prefer sparse planting, microgreen growing is not for you. Next, lightly sprinkle a thin layer of seed-raising mix on top and water it in. The key is to apply a fine layer, just a few millimetres thick, about twice the size of the seeds. If the layer is too thick, the seeds might not germinate, and we don't want you to miss out on microgreens. Finally, place a damp paper towel directly on top of the seed-raising mix and keep it moist until the seeds begin to sprout through the mix. This stage is called germination, and once you observe this, you can remove the paper towel. Well done!


5. Provide the Right Environment
Microgreens thrive in a warm, well-lit environment. Ideally, they should be placed in an area that receives at least 6 hours of indirect sunlight per day. The optimal temperature for growing microgreens is around 18-24°C.
6. Watering
Gently water your microgreens to maintain moist soil without making it soggy. Excessive watering can cause mould or root rot. Using a spray bottle or a bottle-top waterer is perfect for this task, as it lets you lightly water the seeds without disrupting them. Ensure consistent watering, preventing the mix from drying out, particularly as the seeds start to sprout and develop.
Harvesting
For harvesting, take a clean pair of scissors or a sharp knife and cut the microgreens just above the soil line. Be careful not to pull out the roots, as doing so can cause soil to scatter throughout the foliage, and you don't want soil in your food. I prefer to cut half of the trough and store it in the fridge, then cut the remaining half a week later. This can be kept in the fridge for up to one or two weeks, depending on how effective your fridge's vegetable drawer is.
Keep Planting
Don't wait until your microgreens are finished to plant more. Consider succession planting by sowing another tray just as you're about to harvest your first batch. This also depends on the time of year and may need adjustments based on the climate.
Thanks & Follow
For more garden inspiration, follow me on Instagram at Jenna Gardens
Although this gardening blog shares my experiences and factual horticultural information, remember that your gardening journey is unique to you. Adapt, experiment, and learn from your own experiences; that's all part of the process.


Comments